In this tutorial we are going to demonstrate how you can create Double Opt in Email campaign. This will be a step by step tutorial with Screenshots. Double opt in is used to ensure someone who subscribed to your email notifications or updates have done so intentionally and have confirmed the email. This helps to ensure somebody’s email was not randomly submitted by a bot.
What is Double Opt In ?
Double opt in is a process in which anyone filling in a form on a platform, to be contacted via email by the platform, has to confirm their email address, by clicking on the link sent by platform on the submitted email. This ensures that, the form was indeed filled by the owner of the email and not by someone else or a bot who has no access to the email.
This ensures the agreement of submitter to receive future communication by the platform where the form was submitted.
Why Double Opt In is required ?
Double opt in may be required under some privacy laws in some countries. However it is considered best practice in order to ensure the form submission was not done by a spam bot. Further it ensures user’s agreement to receive the communication via email from the platform.
What is the process of Double Opt In ?
The process is really simple, it consists of following steps:
- User visiting the web page is asked to submit a form.
- User submits the form which includes a link to privacy policy and description how the submitted information will be used.
- When form submission is done, the record is kept in a pending opt in list, which can’t be used for further communication unless email is confirmed.
- A Confirmation email is sent with link to a landing page.
- When user clicks the link in email and lands on Landing page(A Thank you page usually), the contact is moved to confirmed list, which can be used for further communication.
- All the Emails sent under this kind of subscription should have a preference and out out or unsubscribe link in the email which should allow user to not receive communication anymore.
Which kind of form submissions should have Double Opt in workflow ?
In Most cases double opt in is implemented on Subscription kind of forms. In which user is providing email and contact data in order to receive further communication at regular intervals. While implementing this kind of workflow a preferences page is also required which lets the user to manage frequency of emails as well.
Creating Double Opt in Campaign in Mautic
In this section let’s jump in and create a real double opt in campaign, this is the campaign I will use for Mautic solutions newsletter subscription campaign.
Create subscription form using Mautic Form
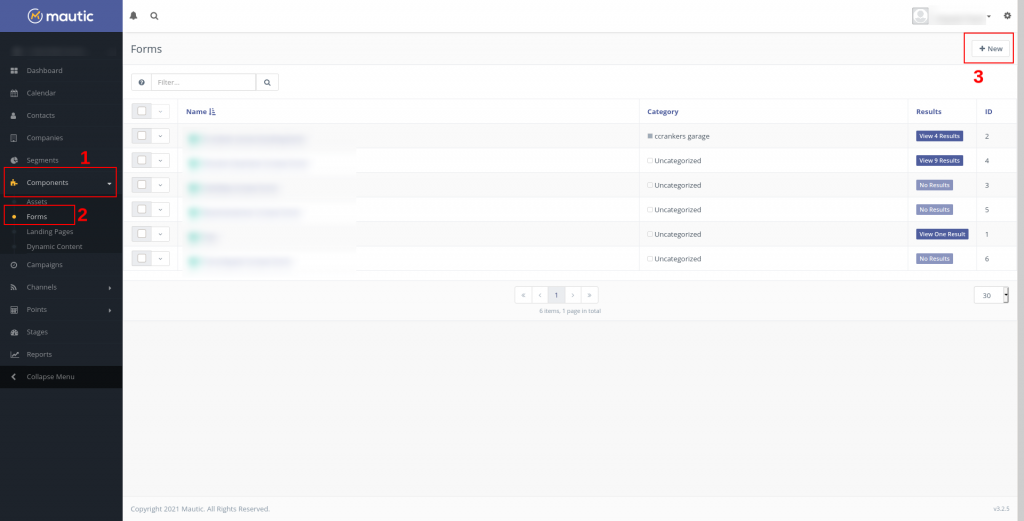
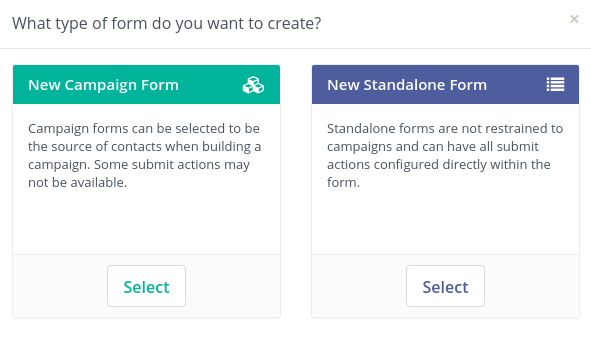
Under Components > Forms create New form, Select “New Campaign Form”.
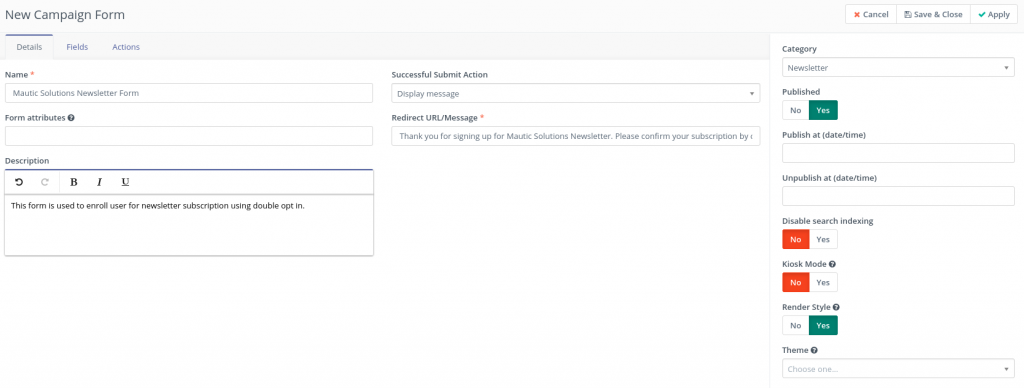
Fill in the form Details Fields
- Name -> The name of the Form.
- Form attributes -> For this campaign you can ignore this field, however for reference let me explain this. The Form attribute allows you to add HTML attribute to the form tag of Mautic form.
- Description -> A description of this form for your own overview, this is shown in the list of forms in Mautic.
- Successful Submit Action -> What action should take place when the form is successfully submitted. This provides 3 options.
- Remain at form -> Do nothing and remain at form, this will just reset the fields.
- Redirect URL -> Redirect the form to the URL provided in “Redirect URL/Message” field. Usually a thank you page is used, but not limited to it.
- Display Message -> Display a message to the submitter.
- Redirect URL/Message -> This field is used in combination of above field in order to either provide redirect URL or the Message to display.
- Category -> This can be used to categorize the form for better organization.
- Published -> To activate or deactivate the form.
- Publish at -> A certain date and time when the form shall be published.
- Unpublish at -> A certain date and time when the form shall be un published.
- Disable search indexing -> discourage the search indexing of the form from search engines.
- Kiosk Mode -> if enabled, no cookies will be created when the form is submitted.
- Render Style -> If the basic form style shall be rendered, if not you can provide your own CSS for the styling of the form.
- Theme -> Apply a them on the form, Mautic provides various themes which can be applied on form.
Fields Tab:
This tab allows to create the fields in the form, for newsletter form we are going to create basic fields, which are going to be first name, last name and email.
- Add a new field from dropdown, choose text type.
- In the popup add label, from the Contact Field choose First name.
- Validation tab, enable validation, then give a validation message.
- Save to add the field.
- Repeat the same for Lastname field.
- Repeat the same for Email field, except the field type should be Email type.
- Once done, your form is ready.
- Save and Close.
We have created a Campaign type form so the Action to be taken must be handled by the Campaign.
Create Segments
We need two segments, One for Pending Opt in and one for Confirmed contacts.
To Create Segment, go to Segments > New.

Add name “Pending Opt In” or whatever you would like to call this, set
- Public segment to No,
- Avaialble in preference Center to No.
- Published to Yes.
We don’t need to do anything else, Just save and close.
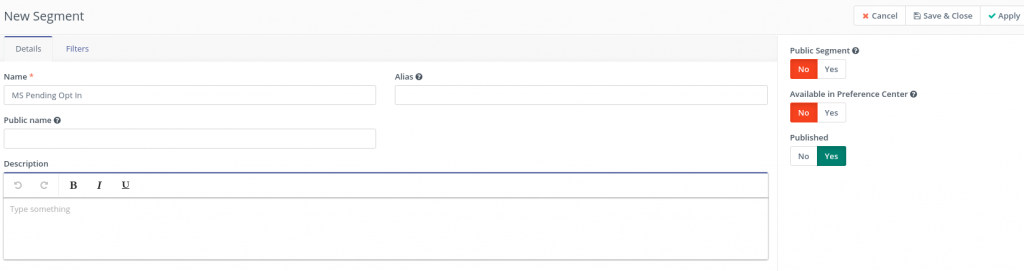
Repeat the same process for another segment, I’ll call it, “MS Newsletter Subscriber”, this time I’ll keep this
- Public Segment to No.
- Available in Preference Center to Yes, in order to make users to choose opt out when the preference center is created.
- Published to Yes.
Next step is to create the Landing page which can be used as confirmation landing page.
Create Landing Page
- go to Components > Landing Pages > New
- Choose a theme
- Fill in details
- Title is the title of the page
- Alias is the url slug
- category you can choose as per convenience
- Enter the Builder,
- Fill in content
- Apply and Close Builder
- Save and Close.
- The Landing page is ready.
Create Email
The process is similar to landing page, Email comes under Channel menu as this is a communication channel. So follow the steps to create an email.
- Go to Channels > Emails > New
- Select “New template Email”.
- Choose a Theme/Template.
- Fill in Details:
- Subject is the Subject of the email as it’ll show in the inbox.
- Internal name is name of the email to identify in the Mautic email list.
- Enter the builder mode.
- Edit the text for email.
- To add the page link there are two ways, one is to use the token insert option in the text editor, other option is to add link using
{pagelink=id}code. - Drag and Drop the slots and elements to customize the email.
- Click apply in order to obtain the preview URL.
- Once done, close the builder.
- Save and Close the Email.
Create Campaign
In order to create Campaign follow the steps below:
- Go to Campaigns in the Side menu.
- Click New button to create new campaign.
- Fill in the Details
- Name is the name of campaign to identify in Mautic.
- Allow contacts to restart campaign if set to yes the contact can restart the campaign from start, if in case it was removed by some other action or campaign.
- Publish date time can be used to schedule the publishing and unpublishing campaign on a certain date time.
- Launch Campaign Builder.
- Because this is a from triggered campaign, choose the Form in root node. Select the form created in first step of this tutorial.
- Click on the Plus Icon and choose
Action>Send Email.- Fill in the Name to identify this module, then choose
Email to Send. From the drop down choose the email created in last step of this tutorial.
- Fill in the Name to identify this module, then choose
- Add another node under the root node to add contact to Pending opt in segment.
- Click on the + icon and choose
Action>Modify contact's segments. - Fill in the name of this node.
- Choose the Pending opt in segment from the dropdown of field
Add contact to selected segment(s).
- Click on the + icon and choose
- Add another node to the
Send Emailnode by clicking + icon at the bottom of it. - From the 3 Options, choose
Decision>Visits a page.- Fill in the name.
- In
Limit to Pageschoose the landing page we created previously in this tutorial. - If you are using some other platform to create landing page(Check out the tutorial on how to Integrate wordpress with mautic and use it to create landing page) then paste the URL in
URLfield.
- If result is positive the campaign will go in green + direction, there add another
Actionnode. Actionnode under the green + icon chooseModify contact's segments.- Fill in the details.
- Choose Newsletter segment from the drop down of field
Add contact to selected segment(s). - Choose Pending opt in segment from the drop down of field
Remove contact from selected segment(s).
- Apply, Close builder.
- Save and Close.
This should be enough for the basic double opt in campaign, the creation of campaign is shown in the video below.
When the campaign is activated and someone submits the form it will go to pending opt in segment, and send a confirmation email to the signed up contact.
When the contact clicks the link in email and lands on the thank you page, Mautic campaign will track the page visit and move the contact from pending opt in to confirmed newsletter segment.
Let’s place the form on a dedicated newsletter page and test by submission. I am using WP Mautic plugin by mautic community.
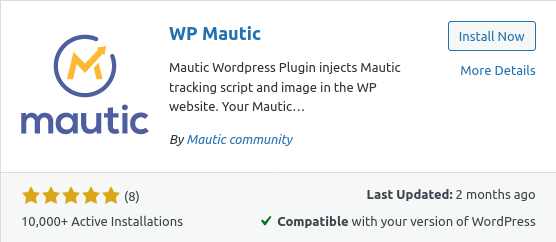
Which allows to place the form using a short code. Once the form is placed, further action can be seen in the video below.
This tutorial is only basic of the campaign, there is a lot more you can do with the campaign, for example sending a follow up email if the email is not opened following would be the steps for the same:
- For this a new node can be added under the Send email.
- Add a Decision Node, Select
Email Opened. - Under the Red + icon, add the
Action>Send Email. - From the options under popup choose
within a relative time period. - Choose the number of days, in this case I choose 2.
- Choose the
Email to sendfrom drop down and Add. - The popup and final campaign looks as follows.
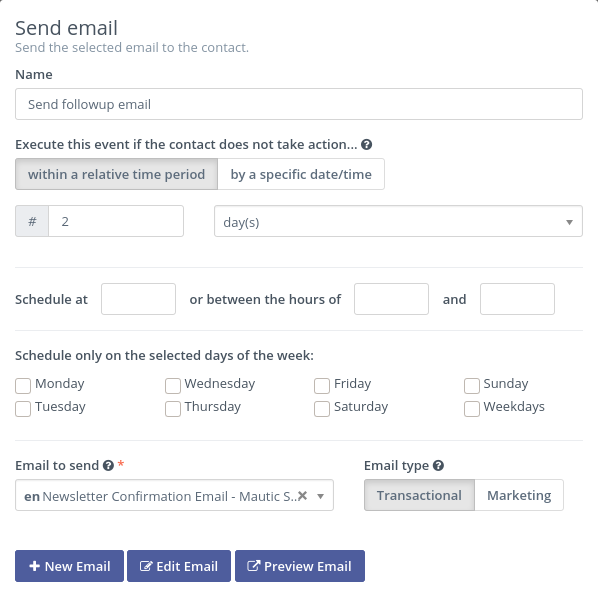
Final campaign looks like below:
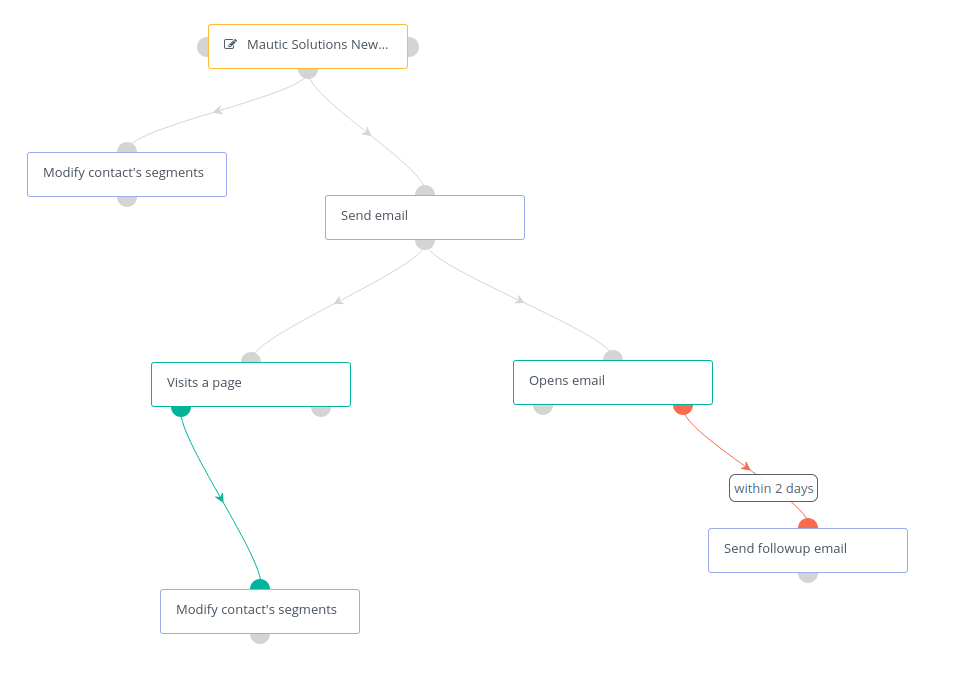
Of course further actions should be configured for this to work, as followup email and actions are usually different than original email. This was just for demonstration purpose.
For any queries please feel free to ask the questions in comment below.