Amazon Lightsail an easy to use and compact version of Amazon AWS. It was a turning point how I used AWS. I was rather hesitant in using AWS before Lightsail as I am not good with Dev-Ops and managing cloud, but with Lightsail it becomes super easy. So Let’s answer the question on how you can configure multiple domain on lightsail with apache2 or
Can I host Multiple Domains or Websites on AWS Lightsail ?
Yes, you can host multiple domains on same instance of lightsail. Steps are really simple:
- Add DNS record to point domain or subdomain to same instance.
- It can be done via Networking Tab in Lightsail or from AWS Route 53.
- Create virtual host on the instance in order to map domain to a directory.
- You can also configure SSL certificate using Let’s encrypt and certbot for multiple domains.
Mapping Multiple domains on same Lightsail Instance
It is actually very easy to host multiple sites on same instance, it is as easy as creating a virtual host on your localhost environment. In this tutorial I will show you how to do the same. Using Apache virtual host as well as using nginx and webinoly which makes it easy to configure ssl certificate on the domains.
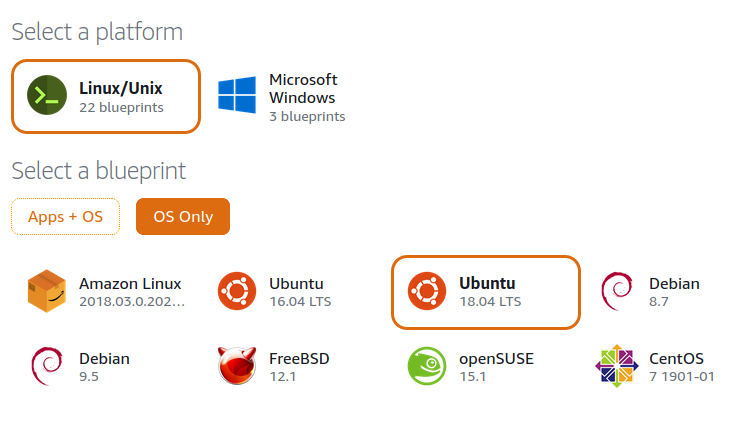
Create a new Ubuntu Instance in Lightsail
- Create a new ubuntu instance from
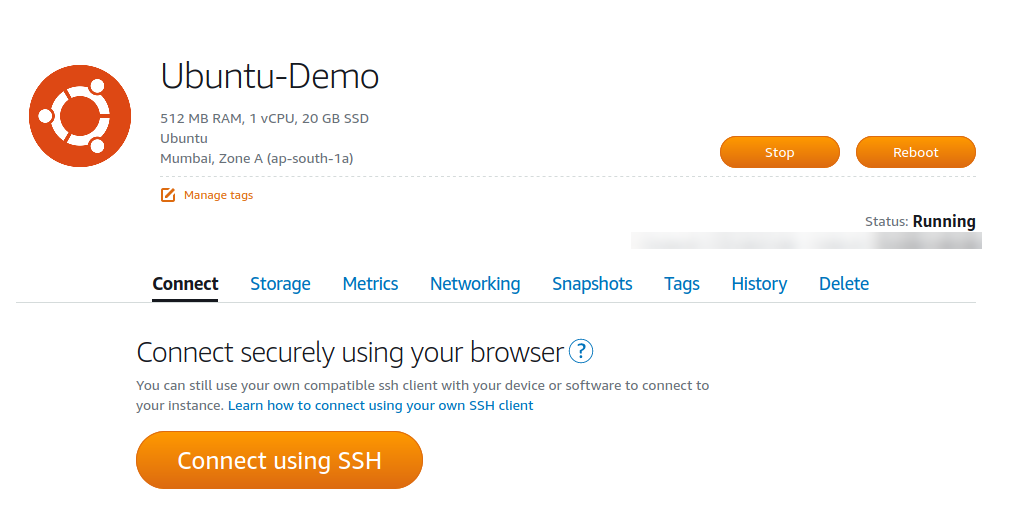
InstanceTab,Create InstanceButton. - When Instance is running, use
Connect using SSHoption to log in into command terminal via browser directly.
Set up Apache2 Server
To Setup a server, I am using Apache2 for first example you can use apache or nginx as per your liking.
sudo apt updatesudo apt install apache2sudo service apache2 status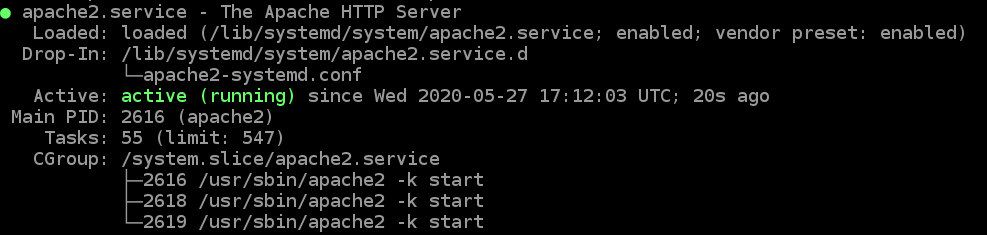
-
When apache2 installed and running create a virtual host.
-
To Create virutal host edit the file
/etc/apache2/sites-enables/000-default.conf -
You will find it already have a
VirtualHosttag with document root pointing to path/var/www/htmlwe are going to edit this to point to a sub-directory./var/www/html/testa -
Un-comment ServerName and add your domain name here. I have used
testa.mayanktiwari.in -
Once done, the file content will looks like following code block.
-
<VirtualHost *:80> ServerName testa.mayanktiwari.in ServerAdmin webmaster@localhost DocumentRoot /var/www/html/testa ErrorLog ${APACHE_LOG_DIR}/error.log CustomLog ${APACHE_LOG_DIR}/access.log combined</VirtualHost>I have removed the comments to keep it clean and short. First domain/app is now done. To configure second or more domains follow these steps.
- Copy paste the same tag (
VirtualHost) below the first one. - Change
ServerNameto another domain. - Change the
DocumentRootto point to another directory where you wish to host the application.
So final code will look like code block below.
<VirtualHost *:80>  ServerName testa.mayanktiwari.in  ServerAdmin webmaster@localhost  DocumentRoot /var/www/html/testa  ErrorLog ${APACHE_LOG_DIR}/error.log  CustomLog ${APACHE_LOG_DIR}/access.log combined</VirtualHost>
<VirtualHost *:80>  ServerName testb.mayanktiwari.in  ServerAdmin webmaster@localhost  DocumentRoot /var/www/html/testb  ErrorLog ${APACHE_LOG_DIR}/error.log  CustomLog ${APACHE_LOG_DIR}/access.log combined</VirtualHost>
As you can see only two lines have changed, however I recommend changing the filename for error and access logs.
- Create directories
testaandtestbin/var/www/htmlso the paths are:/var/www/html/testa/var/www/html/testb
- Inside the directories create a file
index.htmland add some code likeHello, world From TestA!Hello, world From TestB!
- Basically use these two directory as your document roots for different websites.
- Finally restart your apache using the command below.
sudo service apache2 restart
That is all for the back end, Now back in Lightsail panel, go to Networking and create a DNS Zone.
Create and Map DNS Records
To create DNS Record please follow the steps below.
- Go to Networking Tab.
- Create a DNS Zone.
- Add an ‘A record’.
- In the field if you want to use the domain use ‘@’ symbol.
- If you are using a sub domain, then enter the subdomain in the field.
- From the drop down of ‘Resolves to’ choose the newly created instance where you did server configuration in last step. In my example, I have used subdomains as shown in image below.
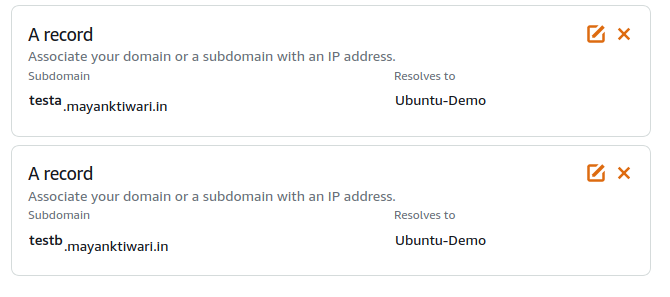
- That’s it, you should be able to access both domains now from browser.
- Each will result in the content you placed in directories assigned to them.
Lightsail Multiple Domains with SSL and Nginx
Previous section was all about apache2 and Lightsail networking tab to create DNS. If you wish to use Route 53 please refer to this post where I have described how you can Map Godaddy Domain to AWS Route 53. In this section I’ll continue the sections from above. This section I’ll describe how to use Webinoly to host multiple domains or multiple apps on Lightsail. I have another article which describes how you can host wordpress on Lightsail with Nginx and Let’s encrypt SSL.
Install webinoly – an optimized Nginx Web Server
- Webinoly is an optimized web server with nginx at the core of it.
- To Install webinoly you only need to use single command on a fresh Instance.
- In first step create DNS zone record, like described in Above section of this tutorial.
- If you’re not using Lightsail networking tab as this has limited free options, you can use AWS Route 53 like described in this post. The link above uses godaddy domain but it applies to any other domain provider.
- Once the domains are pointing to the lighsail instance move on to next step, Install webinoly.
- To Install webinoly, first log in to the server using ssh or lighsail connect option.
- Once logged in, use the command to install webinoly stack.
wget -qO weby qrok.es/wy && sudo bash weby 3- This will install all the necessary packages on the server. It includes the complete set to Support any PHP and MySQL based application.
- Once done, you will get the root credentials for mysql on the console.
- Copy and keep it safe.
- Once webinoly is there, you get a powerful command
sitewhich provides all the feature webinoly has to offer. - To create the virtual host on an available domain use following command.
#to install wordpress immediatelysudo site testa.mayanktiwari.in -wp
#to create a virtual host for any php site with MySQL supportsudo site testb.mayanktiwari.in -msyql- The two commands above are creating two virtual hosts.
- First one is not only creating the virutal host but also installing latest stable wordpress also on domain
testa.mayanktiwari.in. - The second command is creating a virtual host with a mysql database and a configured directory.
- In both cases because system uses mysql database, the command will create a database and assign a user to it.
- Credentials for each site is provided to you on console.
- If you wish to look the created sites you need to run
sitecommand with-listoption.
#list the existing sitessudo site -list + testa.mayanktiwari.in (WordPress) + testb.mayanktiwari.in (PHP)Found: 2 sites- To install and configure the SSL from let’s encrypt you need to run one more command.
#Enable ssl certificatesudo site testa.mayanktiwari.in -ssl=on- This command will initiate the process to obtain SSL certificate from Let’s encrypt.
- Please note that, this process requires
www.subdomain configured for the main domain, otherwise it gives error. - You need to follow the instruction on screen and it’ll configure the certificate for you.
All this information and more examples are available on this detailed tutorial page of webinoly.